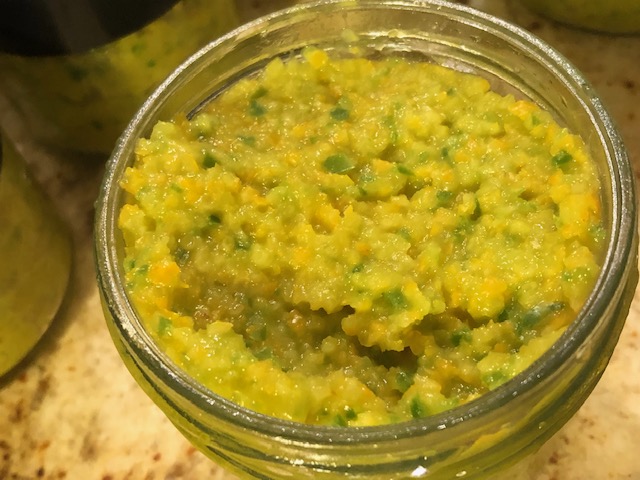
Yuzu Kosho -Japanese Yuzu Seasoning/Condiment

In Japan, there are other citrus fruits besides lemons and limes. Yuzu, Sudachi, Kabosu, and Yuko and more. I love Yuzu because of its unique aroma. I have seen more Yuzu in Asian markets last ten years, but I have yet to see other citrus fruits here.

Lemon has a clearing, pungent flavor and a tangy sourness when you put it in your mouth (Meyer lemon is different). The scent of lime is slightly lighter than lemon, but when harvested before the matured stage, it has a solid tangy acidity, and the character is a light yet fresh and pleasant scent than lemon.

Yuzu has different enjoyment tastes depending on harvested time: when it is still green or yellow ripe. After ripening, the juice has a slightly sweet and refreshing flavor and somewhat neutralized acidity.

After about three years of planting a yuzu tree in my garden, I was excited when it finally produced even one fruit. We used it only zest preciously. 

The following year, I harvested a small but a few more fruits. We mixed the zest of green yuzu (green yuzu season from July to August) and the yuzu fruit to make a yuzu paste.  It was simple but so flavourful, and we enjoyed it so much. Since I only harvested a few yuzu fruits, we could only make a small amount of yuzu paste, so we used it for hot pot vegetables and salads, and it was gone in no time.

I wished it would be nice to make it more.

A few months later, a friend in Clovis contacted me she had harvested yuzu, more than she could use, so we went to pick them up on the way back from North Fork. She gave me so many Yuzu fruits!

Wow, somebody was listening to my wish; I was grateful.
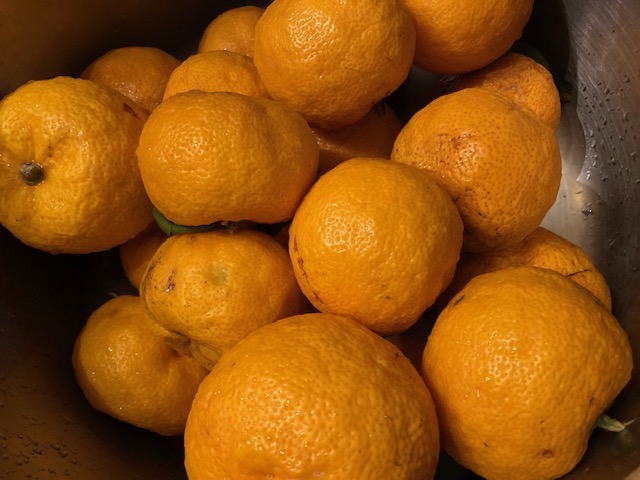
I suggested making *Yuzu Kosho to Eric this time.

*Yuzu Kosho is a type of Japanese seasoning/condiment. 

Kosho means in Japanese “pepper or peppercorn,” so usually white or black pepper. Yuzu Kosho originated in Oita, Kyushu (south island).  

Since it is called “kosho” pepper, I thought it would be made with yuzu and white or black pepper, but I found out that in some parts of Kyushu, pepper is an old word that means Japanese chili pepper, not white or black pepper.

I never tasted homemade Yuzu Kosho, and the commercial Yuzu Kosho is usually made with “green yuzu.” 

The yuzu fruits I got from my friend were “ripe yellow yuzu,” so I wondered how they came out as Yuzu Kosho. 

I heard that ripe yellow yuzu has less bitterness, mild taste, less spiciness, and a sweet aroma, so I was excited even before I made it.

I’m not so good with spices, so I used fewer chili peppers, giving a perfect hint of spicy taste blended with a rich aroma!

Yuzu Kosho Recipe

Ingredients:

100g Yellow Yuzu zest

25g Green Chili pepper (Japanese Green Chili is recommended, but we used Jalapeno chili)

25g Sea salt

* These ingredients are what we used – most of the recipes you find they use Yuzu and Chile pepper are the same quantity, and sea salt is one-third of the Yuzu amount. You can adjust how spicy and salty by your preference.

Instruction:

1. Wash yuzu fruits and green pepper with water and dry them with a kitchen towel. 

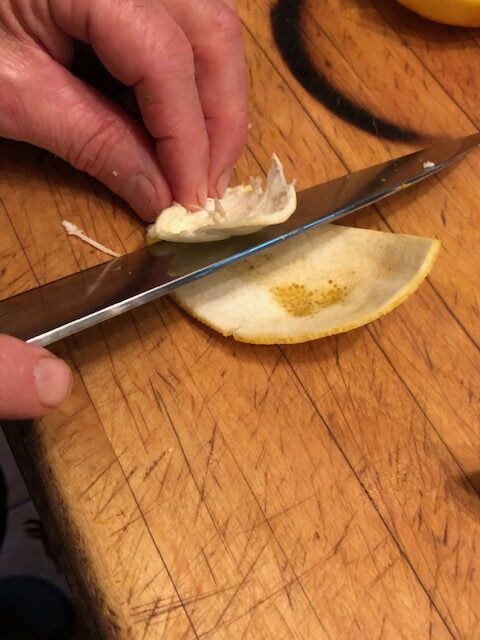
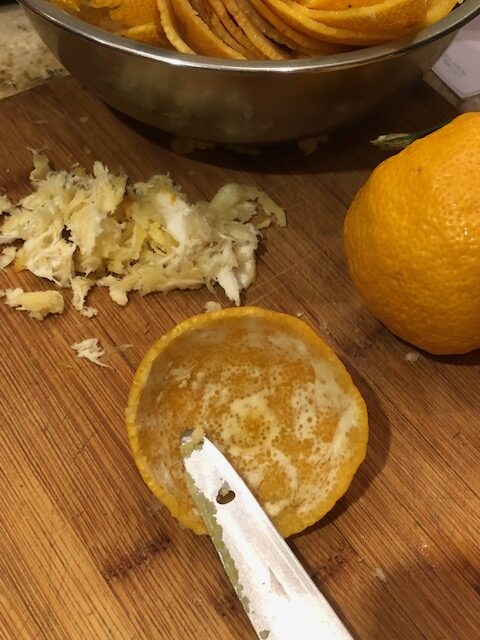
2. With a knife, remove any black spots on the skin and cut yuzu fruits in half. Remove the seeds (Yuzu has so many seeds I used a tiny spoon to pick them out.) Separate yuzu fruit from the skin. Avoid the white pith under the skin’s surface between the peel and the fruit as much as possible. If you use the pith, it will make the yuzu kosho bitter. We scraped the pith with a knife carefully to take the pith as much as we could.
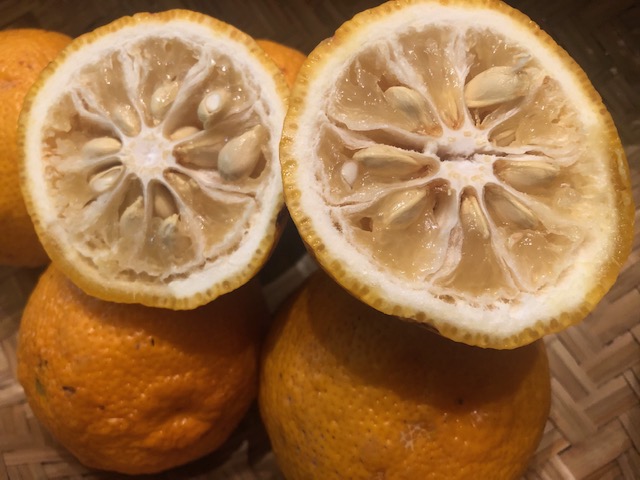
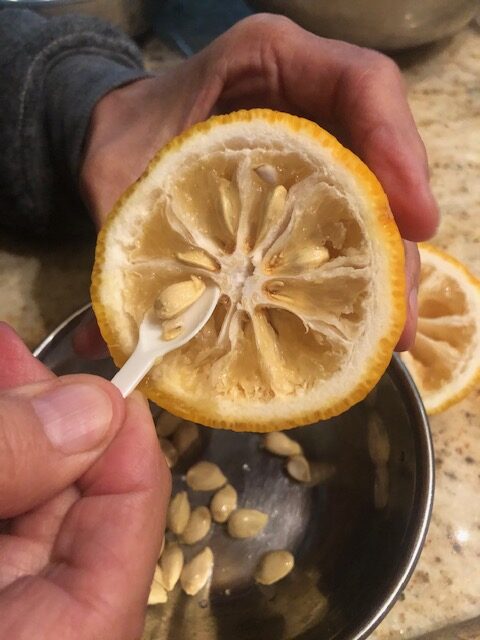
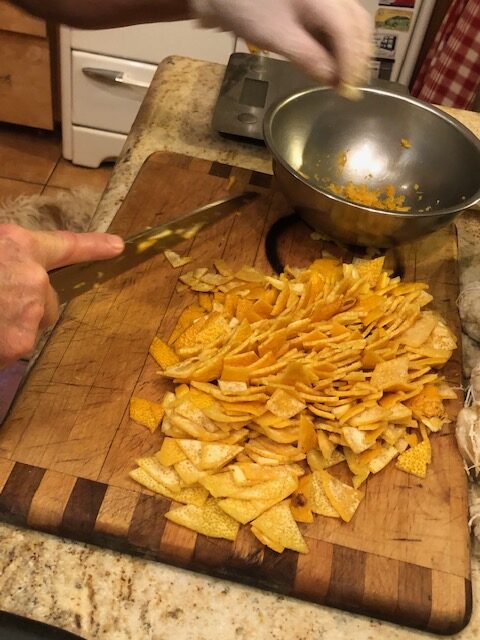
3. Cut yuzu skin.
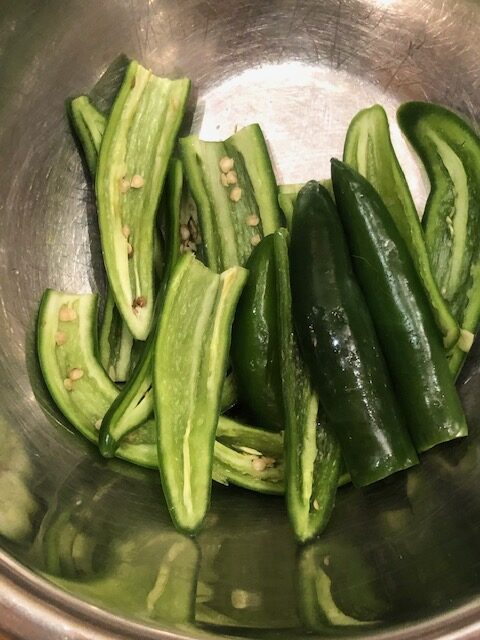
4. Remove the seeds and stems of green chili peppers, which have a potent stimulant and can irritate the eyes and skin of some people, so be careful if you have sensitive skin (you might want to use kitchen gloves and don’t touch your eyes or mouth when preparing).
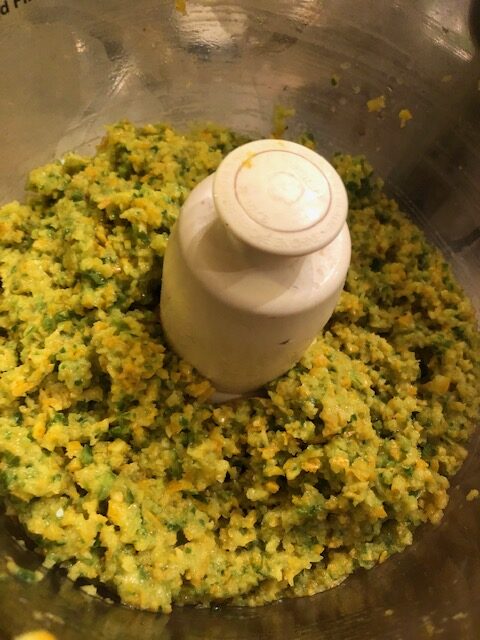
5. Place yuzu skins, green chili, and sea salt into a food processor. Smooth over the ingredients. Keep processing until the ingredients become well combined and smooth. 
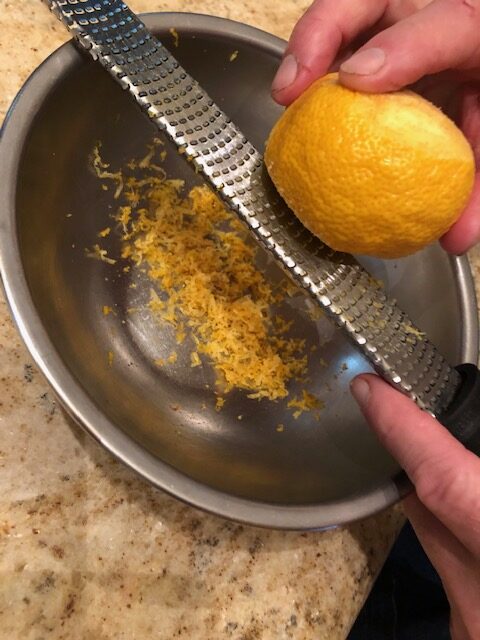
When I did not have a food processor, I used a grater.

I did not need to remove the fruit or pith when I used the grater. After washing and drying out the yuzu, grate the skin surface, but I had to remember not to include pith as much as I could. 
I ground the grated yuzu skin first, then finely chopped green chili, and sea salt at last in my Japanese mortar, ceramic Suribachi, and wooden pestle, Surikogi. 

It took time for me to make it this way, so if you are going to use a pestle, be ready to have your patience and time. 

6. Prepare the jars using as hot water bath canning method to preserve the yuzu kosho.

Yuzu kosho is ready to use for dishes. 

I like to keep it in the fridge for at least one week, the spiciness becomes milder, and the flavor is more harmonized. 

If you have juice left, you can use it for dressing or dip sauce with miso or tamari or soy sauce for steamed tofu, dumpling, and potsticker. Enjoy!

One of my cats, Tin Tin loves Yuzu aroma so he stayed in the kitchen while we were making.

Love, Sanae ❤️

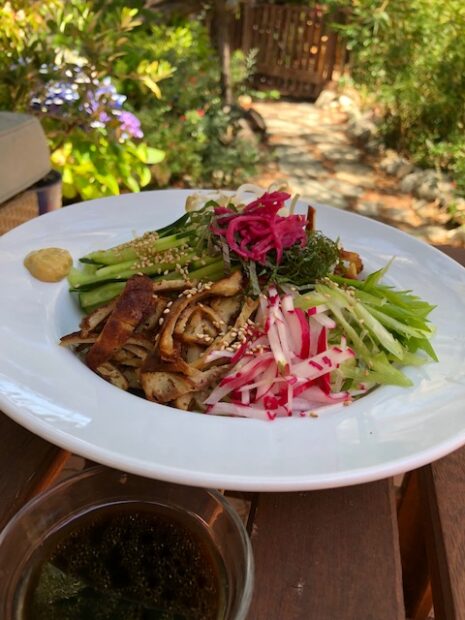
Vegan Hiyashi Chuka (Cold Ramen)

I grew up loving Japanese noodles of udon, soba, ramen, hiyamugi, and somen so much!

One of my favorite noodle dishes in summer is Hiyashi Chuka (Cold Ramen). It is “Ramen Salad” to me!

When I started to eat vegan plant-based macrobiotic food in 1993, I thought I had to give up eating ramen noodles, but I found some companies were making vegan ramen noodles in 2005 and had been enjoying them since then. 

Eric and I served Goddess Miso Ramen in the winter season at our “Seed Kitchen” restaurant in 2008~2016.

Summertime ramen must be Hiyashi Chuka (Cold Ramen). I had to introduce it to Eric.

We do not have hot, humid summer here in Santa Monica like in Japan, but I crave to eat Hiyashi Chuka (Cold Ramen) every summer, so I had to make it again this summer.

It is like cold soba noodles, but a much uplifted and happy feeling and cools my palette when I eat Hiyashi Chuka (Cold Ramen); verse cold soba gives me cooling, but a grounding, contented feeling. 

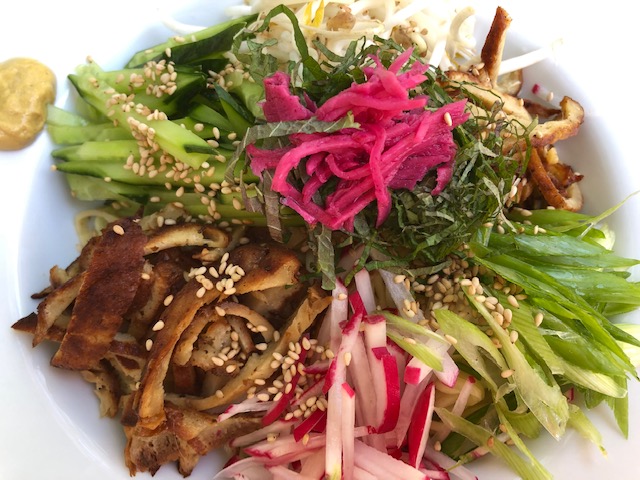
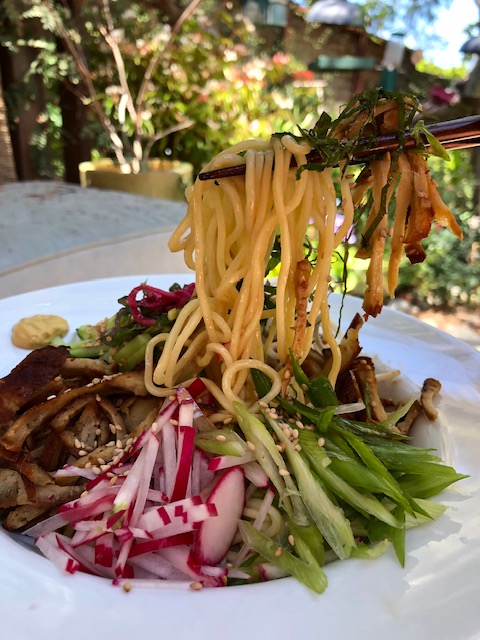
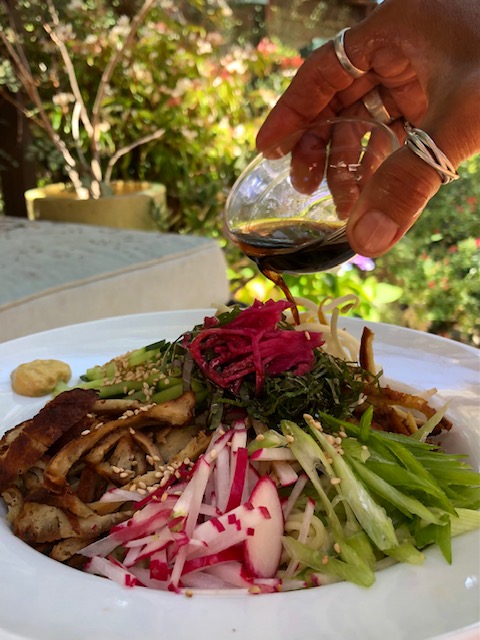
You can create what you want to put on the top. I like cucumber, seitan/tofu, scallion, green shiso leave, and homemade red shiso pickled ginger on top.

Japanese karashi hot mustard is on the side, with homemade tamari (soy sauce) and sesame seed sauce.

I have seen Hiyashi Chuka packages in the Japanese market, but they are full of MSG and preservatives, so I have never used them. Vegan ramen noodles are available at natural food markets here, but if you can’t find them, you can use other vegan noodles.

I hope you try making it; then you will know how delicious and enjoy summer ramen!

Hiyashi Chuka (Cold Ramen) Recipe

Servings: 2~3

For Hiyashi Chuka Sauce

  • 6 Tbsp Tamari (soy sauce)
  • 2 Tbsp Mirin
  • 2 Tbsp Lemon juice(if you want sweeter taste use orange juice)
  • 1~2 Tbsp roasted sesame oil
  • 2 Tbsp Kombu dashi* or water
  • 1 Tbsp toasted sesame seeds
  • ¼ tsp grated ginger
  • ½-1 tsp la-yu (option Japanese chili oil)

For Toppings

  • 1~2 Japanese or Persian cucumbers (or ⅓ English cucumber, julienned)
  • 3 Red radish (cut into thin strips)
  • ½ tomato (cut into wedges)
  • 3-4 slices Seitan (cut into thin strips)
  • 2 scallions (cut into thin strips)
  • 3 Green shiso leaves (rinse and pat dry)
  •  Red shiso ginger pickle (benishoga, kizami beni shoga, if you buy them at the store, make sure there is no MSG)

For Hiyashi Chuka Noodels

  • 2~3 servings of fresh vegan ramen noodles (6 oz or 170 g of fresh noodles per person)
  • 1 Tbsp toasted sesame seeds (optional garnish)
  • Japanese karashi hot mustard (optional side garnish)

To Make Sauce:

  • *Kombu dashi – Stove top method: combine the kombu and water in a saucepan over medium-high flame. Bring to a boil, reduce the heat and simmer for about 20~30 minutes. Strain out the kombu and use it for sauce when it cools (this recipe from Love, Sanae).
  • Combine all the sauce ingredients in a medium bowl and whisk them together. You can keep it chilled in the refrigerator for up to a week.

To Prepare Toppings:

  • Cut all the topping ingredients into thin strips (so it’s easier to eat with noodles).

To Cook Noodles:

  • Bring a big pot of water to a boil and add the noodles. Separate the noodles before dropping them into the water. Cook according to package directions. Drain the water and rinse the noodles to remove starch. Soak the noodles in a bowl of ice water to cool. Drain thoroughly and divide the noodles into individual plates/bowls.

At last:

  • Place all the toppings and put Japanese karashi hot mustard on the side. Pour the sauce just before you eat with your favorite amount. 

Bon appétit! 

Love,

Sanae ❤️

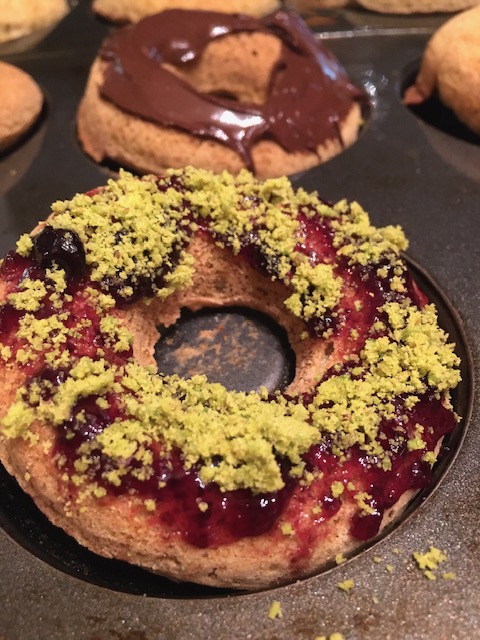
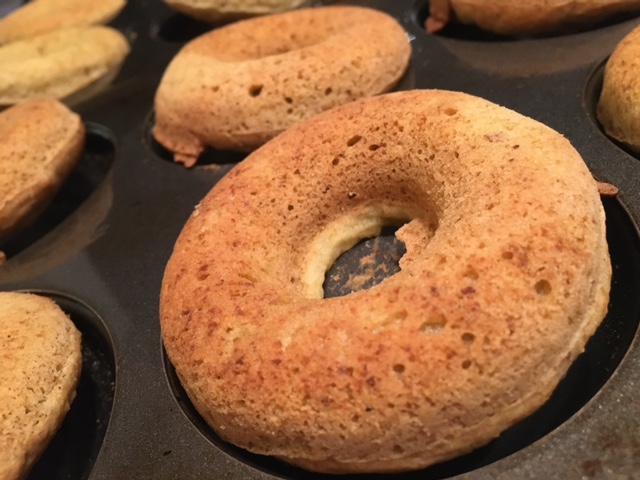
Gluten-Free Oil Free Vegan Plant-Based Baked Donuts

Gluten-free and none-fried donuts and vegan plant-based? 

Enough to satisfy health-conscious donut lovers.

Autumn and winter’s weather is getting cooler and cold, baking and longer cooking are warm up the house, and the aroma of baking foods and snack help to ground our energy. Instead of going out like summertime, we stay home and read, write or create inside at home is a natural universal order. Restful activities support our health for next spring.

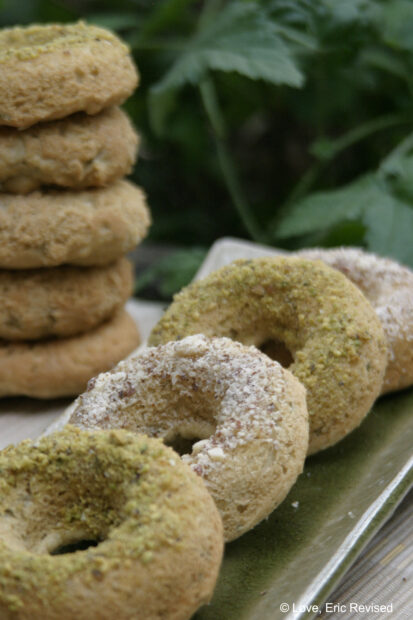
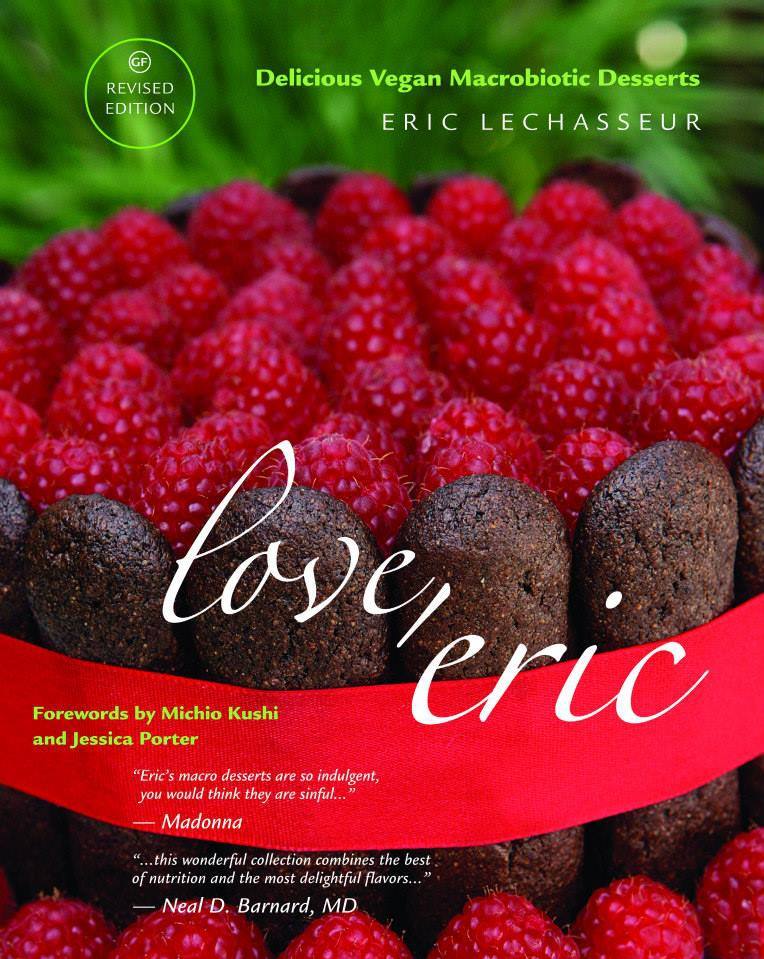
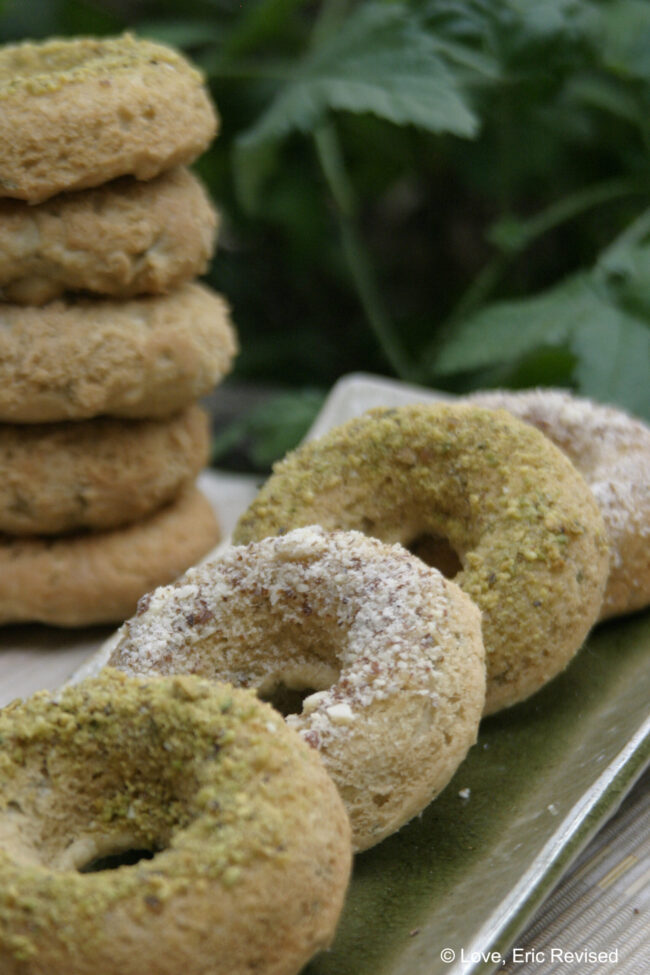
The original recipe of Gluten-Free Baked Donuts is on Eric’s revised dessert cookbook “Love, Eric,” none-fried donut, but it has a little oil in the ingredients.

If you are interested Eric’s desserts cookbook, you can purchase from my website https://sanaesuzuki.com/product/love-eric-revised/

Gluten-Free and None-Fried Vegan Donuts Original with oil

Make 12 donuts

For the donuts:

3⁄4 cup gluten-free flour mix

 1⁄2 cup almond flour

 1⁄4 cup arrowroot powder

 1 1⁄2 teaspoons baking powder

1⁄2 teaspoon xanthan gum

1⁄4 teaspoon sea salt

 1⁄8 teaspoon baking soda

1 tablespoon fresh rosemary, chopped

1⁄3 cup maple syrup

1⁄3 olive oil

juice from one lemon

zest from one lemon

1⁄2 cup hot water


For the toppings:

1/2 cup almonds, pistachios, walnuts, pecans or any other nut of your choice

olive oil for brushing donut tops


To make the donuts:

1. Combine the flours, arrowroot powder, baking powder, xantham gum, salt, baking soda and rosemary in a bowl and set aside.

2. In another bowl, mix the wet ingredients until creamy.

 3. Pour the wet ingredients into the dry mix, add the lemon zest and stir until the mixture is slightly lumpy.

4. Using a 2-ounce ice cream scoop, pour the batter into a donut pan and bake at 350°F until golden brown, about 16 minutes.

To make the topping:

1. Place finely chopped nuts on a plate.

2. Brush the tops of each donut with olive oil and sprinkle with chopped nuts.


Recently, Eric created gluten-free and oil free baked donuts recipe for Chef AJ’s youtube show. It will be on Saturday, November 14th, 2021, at 11 am by Zoom. You can see it on her Facebook too.

Now it is on YouTube.

Gluten-Free Oil-Free Vegan Baked Donuts 

MAKES 12 DONUTS

For the donuts:

3⁄4 cup gluten-free flour mix

 1⁄2 cup almond flour

 1⁄4 cup arrowroot powder

 1⁄2 teaspoons baking powder

1⁄2 teaspoon xanthan gum

1⁄4 teaspoon sea salt

 1⁄8 teaspoon baking soda

1⁄3 cup maple syrup

1⁄3 coconut yogurt 

1⁄2 cup purified hot water


For the toppings:

1 tablespoon kuzu (also known as kudzu medicinal starch)

½ cup purified water

½ cup strawberry jam or maple butter

To make the donuts:

1. Combine the flours, arrowroot powder, baking powder, xantham gum, salt, baking soda in a bowl and set aside.

2. In another bowl, mix the wet ingredients until creamy.

 3. Pour the wet ingredients into the dry mix and stir until the mixture is slightly lumpy.

4. Using a 2-ounce ice cream scoop, pour the batter into a donut pan and bake at 350°F until golden brown, about 16 minutes.


To make the topping:

1. Mix the kuzu and water in a pan, bring to medium heat and frequently mix until clear and thicken. Add the jam or maple butter and mix again.

2. Top each donut of jam with a spoon.


I enjoy my baked donut with my roasted brown rice twig tea or grain coffee.

Enjoy your delicious baked donuts!

Love, 

Sanae ❤️

New Year Elderberry Mocktail 

The last day of 2020.

The whole world has been to go through an upheaval year.
This America has had the most Covid 19 virus-infected in the whole world;19,455,045 cases and 350,778 death was reported so far.
The sad year of 2020.


Not Pandemic related, but I have had my own painful experienced this year.
I have been meditating every day more mindfully observe and purified my mind to see the blight side.
I’m ready for the new year of 2021.


Christmas weekend, Eric and I went to North Fork, California (near Yosemite) with our six dogs and two cats family.
For the first time, we just did not do much, ate, slept, did meditation, walked in nature, and watched Netflix.

Christmas photos of dogs


Mai Mai Love with lentil soup


Christmas in NF 2020

Christmas day in NF 2020


We came back to Santa Monica and we had lots of rain three days ago.
It was a beautiful day today.
Looked at the sky and felt sunlight.

The last day of 2020 Sky


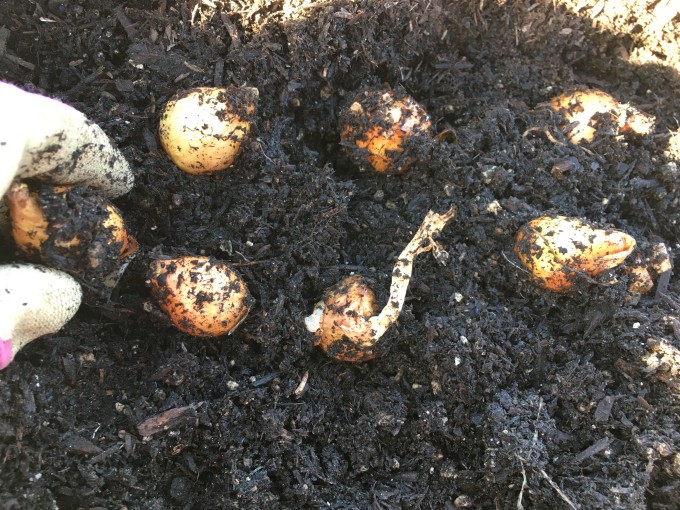
I spent a slow relaxing time and just planted shallots in the planter on the rooftop garden.
Usually, I feel I needed to plant much more after rain, but it was just shallots and I was satisfied and relaxed.
I am learning to do much less.

PLanting shollots


Animal family is also relaxed when I am relaxed.

Relaxing dogs


Mai Mai Love with Tin Tin on the bedI am grateful for this relaxing last day of 2020.
Grateful to have health and welcome 2021.

Grateful to Eric and the animal family to live with me.

Grateful to family, friends who support my soul.

Grateful to my garden, trees, flowers, plants, and birds.

Grateful to sky, sun, moon, ocean, mountain, and nature.

Grateful to be able to write this blog.

Grateful to people who read my blog.

Grateful to 12 steps program.

Grateful to Vipassana meditation.

Grateful to macrobiotics practice.

Grateful to myself.

Thank you so much from the bottom of my heart.


I want to introduce a tasteful new year mocktail (none alcohol cocktail) with elderberry which I love to make tea and introduce on my blog before

Healing Elderberry Tea

I am in 12 steps program and sober for almost 36 years so I am looking forward to drinking this special mocktail to enjoy.

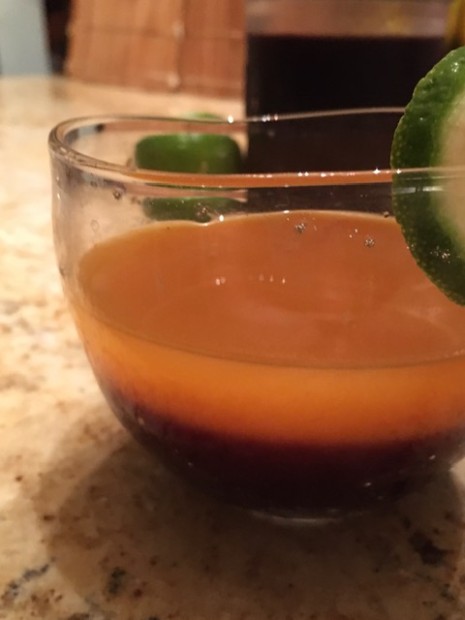
Elderberry Mocktail


New Year Elderberry Mocktail

Makes 1 drink

Ingredients

  • Peach juice
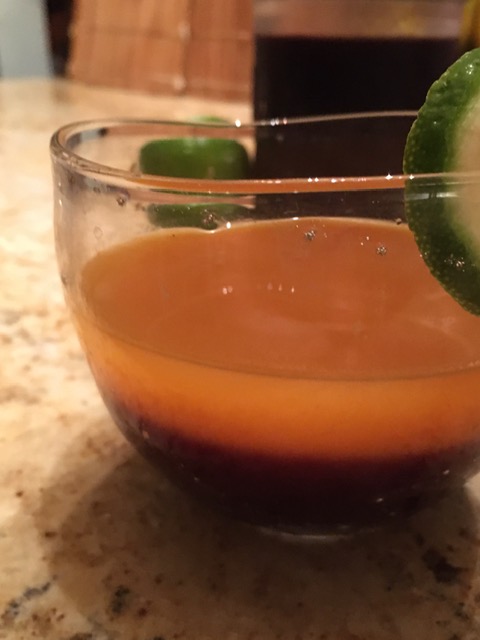
  • Infused elderberry and white grape juice (*see below how to make)
  • Lime juice

Directions

  1. Fill a champagne flute or a glass about halfway with peach juice.
  2. Gently pour infused elderberry and grape juice over the top to create layers of color.
  3. Add a squeeze of lime juice to add.
  4. Enjoy!

Pro Tip: Using a spoon to catch the initial splash helps to maintain the two-tone color.


*Infused Elderberry and White Grape Juice

Makes 6-8 drinks

Ingredients

  • 8 ounces organic white grape juice
  • 1/4 cup to 1/2 cup dried elderberries, to taste
  • 1/4 cup to 1/2 cup dried lemon peel, to taste

Directions

  1. Put all ingredients into a saucepan over medium-low heat.
  2. Heat to approximately 200°F, just before boiling.
  3. Remove from heat, cover with a lid, and let infuse for 30 minutes.
  4. Strain the grape juice into a separate pint jar.
  5. Store infused-grape juice in the refrigerator—it should be used within 5 days.


Recipes source from https://blog.mountainroseherbs.com/elderberry-bellini


Eric and Sanae Casckedel fall


Love,
Sanae ❤️

Homemade Pickles Class

Wow, it has been three years since I taught my cooking class.

I was teaching plant-based macrobiotic cooking classes for over 20 years; one of the popular cooking classes was “Homemade Pickles”.
Why homemade pickles are a popular class because many pickles that you buy in the stores are made with preservatives and have even refined sugar.
Also, not easy to find organic ingredients pickles, and if you find ones they are pretty costly, so it is better to make at home.
Another big reason everyone loves pickles because there are lots of health benefits; it helps digestion, vitamins, fiber, and probiotic cultures, and it is easy to make if you follow steps!

I was scheduled to teach another Pickles class in spring 2017, but I had to cancel it.
I had to stop working completely to heal myself.
Since then, I was asked if I am going to teach how to make pickles again many times.
So my answer was, “I hope so.”
I am happy to let you know that my answer is now…

“Yes, I am teaching how to make pickles again!”

I am well now physically and emotionally.

I appreciate Ginat and Sheldon Rice to asked me to teach at their Whole Health Macrobiotic Forum-A Free Online Zoom Seminar.

July 1, Wed. 7 ~ 7:45 pm Israel time (California time 9 ~9:45 am PST).

https://us02web.zoom.us/j/3706191853.

It recoded and showing on Youtube after the live zoom.
The YouTube link is https://www.youtube.com/watch?v=e0N9IVedOlw

I hope you can watch and let’s make homemade pickles together!


Here are what pickles I am making and the ingredients so you can try to make delicious pickles with me.

Pounded Cucumber with Umeboshi Plums Pickle

Ingredients:

3~4 Cucumbers (Japanese or Mediterranean kind with no or fewer seeds)

3~4 Umeboshi plums


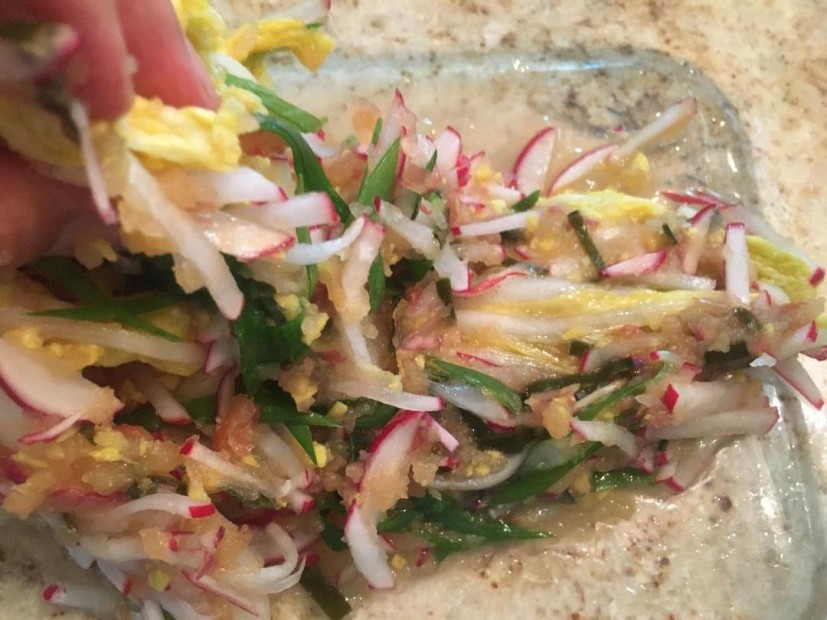
Nappa Cabbage with Five Flavors Pickle

Ingredients:

1/4 Nappa cabbage (about 1/2 lb = 250g)

1 Tablespoon Sea salt (about 15g =6 % of the weight of Nappa cabbage)

4~5 Red Radishes (about 100g = 1/4 lbs)

20 g Scallion (about 3~5 green part)

10~15 g Ginger (about one tablespoon)

5 g Kombu (thinly cut or sliced)

100g Apple, grated (about one apple)


Carrot Miso Pickle

Ingredients:

Carrot
Miso

(Quantity of Carrot and Miso depend on the size of glass jar)

One glass jar


I hope you enjoy this class and see you soon!


Love,
Sanae ❤️

Homemade Brown Rice Cream for Special Healing

The first time I made Brown rice cream was when my mother was very ill and couldn’t eat much of anything.
I remember when she put the cream in her mouth and was able to swallow it, she said with tears in her eyes, “So good…thank you.”
Later, she remarked how warm and better she felt inside.

To me, this experience exemplified what I believe “true healing” is all about.

When I started chemotherapy for Primary Liver Diffuse Large B-cell Non-Hodgkin Lymphoma (caused by Hepatitis C that I got from the blood transfusion when I had a  life-threatening car crash in 2001) last year, I had no idea the side effects included a change in my taste buds.
During chemotherapy, I  was not able to eat many of my favorite foods, including miso soup, leafy greens, sea vegetables like hijiki and arame, soy sauce, umeboshi plum seasoning, etc.

I was very weak, and not only was I not able to eat anything, I could not digest the food, so Eric made soft rice porridge.
One day I remembered how much Brown rice cream helped my mother, so I asked Eric to make it for me.
This was the best thing I could have asked for!

Homemade brown rice cream is very digestible, and when I put it in my mouth in the hospital room during my first chemotherapy, I felt that the warmth and creaminess of brown rice cream gave me comfort deep inside.
My feeling of tightness out of fear and sadness were lifted away.

Homemade brown rice cream is, on top of these benefits, is very nutritious for special healing.

I have been eating it for breakfast every day for over one year.  I love the soft gentle texture, which makes me feel calm and at peace.

 My mother was right.  I feel warm and better each day.

Hope you try it someday!

With Love,

Sanae 💖

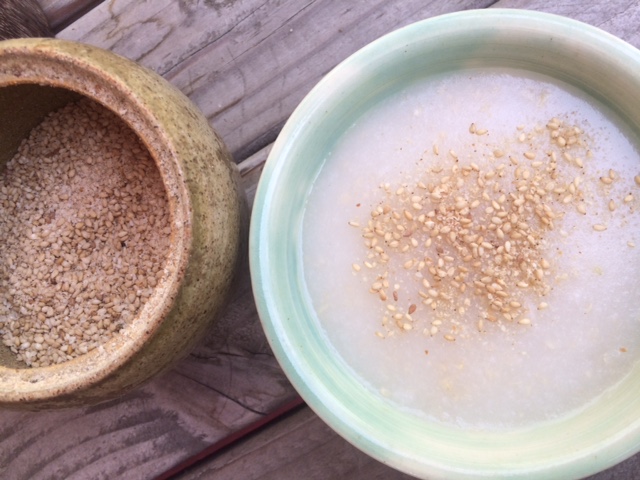
B rice cream with gomashio

With gomashio (sesame salt) condiment


Recipe

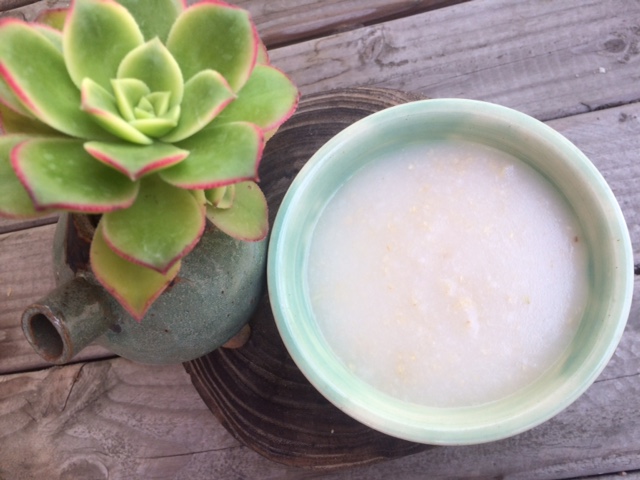
HOMEMADE BROWN RICE CREAM
for special healing

1 cup brown rice

10 cups purified water

pinch of sea salt

condiment (option)

  1. Wash and soak the brown rice for over six hours to overnight.
  2. When soaking is completed, transfer the rice to a cast-iron or stainless steel frying pan over medium-low heat. Using a wooden spatula, dry roast the rice until it is uniformly golden brown and the rice releases a nutty fragrance.
  3. In a stainless steel or ceramic pot, combine the toasted rice and the water over a medium-high flame until the water begins to boil. Add sea salt, and cover with lid.
  4. Place a flame deflector over the flame, reduce heat to low and simmer for 1 1⁄2 to 2 hours, or until half the water has evaporated.
  5. Wait an additional 5 to 10 minutes, remove the lid, and allow to cool.
  6. Transfer rice to an unbleached cheesecloth or a very fine mesh stainless strainer (food mill) that is placed over a bowl. Squeeze or mash the rice cream to separate it from the pulp.
  7. Transfer the cream back into the pot over a medium flame to reheat.
    Serve hot. You can add condiments* if you like

* Condiments:  Varieties are gomashio (sesame salt), an umeboshi plum, scallions, chopped parsley, sunflower seeds, or pumpkin seeds etc.

Recipe from Love, Sanae cookbook

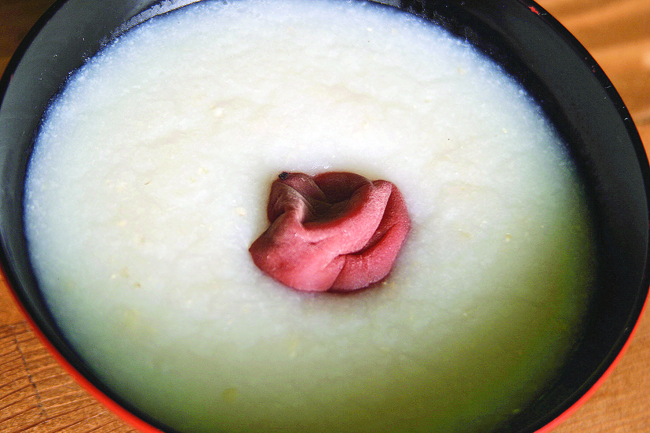
B Rice Cream with umeboshi 650

with umeboshi plum condiment/pickle